CG Generalist Reel- Summer 2013


This is my updated reel as a CG Generalist. I am looking for an internship this summer (June - August) in an animation/VFX studio.

I am comfortable with most parts of the production but the ones that I specialize in are Modeling, Rigging, Lighting and Rendering. I can also write small scripts in MEL depending on the need of the production.

The Reel contains extracts from my following projects:

1. CG Shortfilm 'Psych'.
2. 2D + Live Action Integration Project.
3. 3D + Live Action Integration Project.
4. Drop Splash Simulation Test.
5. Photorealistic Shading and Rendering of Apples using Procedural Shaders.
6. Character Modeling and Shading, Work done on last internship.
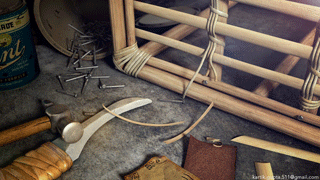
7. 3D Stills- Cane Workshop, Photorealistic Modeling/Shading/Lighting.
8. 3D Still- Coffee Machine, Photorealistic Modeling/Shading/Lighting.

I hope you enjoy the Reel!

Download Reel (Right Click > Save Link as)
>SD (640x360p, 6 MB)
>HD (1280x720p, 17 MB)


Read more »

Rigging Reel Summer 2013


This is my Rigging reel comprising of works done in this year, majorly my shortfilm 'Psych', and few works from the last year. The rig shown in the showreel, 'Mike', is my first character Rig, and I hope you enjoy the Reel. There are a few lighting works in the end which were done last year.

I am looking for an internship this summer as a CG Generalist with more interests in Rigging, Modeling and Shading/Lighting.


Showreel Breakdown :


1. Shot from my latest short film 'Psych' , made in a production time of around 4 months. Starting from original pitch, story and character designs, then working on production schedule to finish stages one by one such as modeling, texturing, rigging and then rendering the final images. Some time the actions had to be done parallel to each other to save production time. The thing that I enjoyed most was working on the character rig and articulation. There's just so  much in it for me to learn in it.

2. Turntable of the main character 'Mike' from the shortfilm, including the wireframe and textured/shaded model.
The character was shaded using 6 different maps used namely, diffuse, subdermal, epidermal, specular, gloss and displacement.

3. Facial Rig demo 'Mike', created using blendshapes in maya, connected to curve based controllers.
My aim was to articulate the face as accurately as possible as my character was quite realistic.
The entire facial rig including blendshapes and controllers took around a weeks's time.


4. Character Rig demo 'Mike'.

Well this is the most important part of my showreel.
This was my first full character rig so there was  a lot to take care about. I had made a planning of the kind of movements the character will have to do in the shortfilm according to the story, and then listed out the kind of setups and rig I will have to make in order to be able to animate it properly. I had IK/FK for both arms and legs, as well as additionaly I had
both IK/FK setups for the fingers as well as there was a shot in my short film, where the character tries to imitate a walk cycle using his fingers, so this was included in the planning that I will need an IK setup for that.
Another highlight was the setup created for the tie of the character. It was created by using a dynamic curve (maya hair system) to drive a chain of bones, so that the tie of the character could be simulated realistically. I chose this option over cloth simulation, because it would save a lot of simulation time and gave almost the same output.

I also had to create a setup for roll bone for realistic wrist rotations, which were controlled by a set of expressions written in MEL, and for added control I also added a controller to tweak the rotation of the roll bone.


5. Few more clips from the shortfilm, to demonstrate the Rig and model efficiently being used in animation.


6. Turntable of character model/sculpt and texturing work done during the 2 month internship at Green Forest Animation, Shenzhen, China. The time taken to finish this was 2 weeks. The character is 'Betty', and was made to be used in studio's upcoming short 'Amour'.

7. Cane workshop, still image compositions of Project done last year based on the theme Artisans.
The process included coming up with original concepts for the artisan's workplace, field research to actual workshops,
modeling, rendering and final compositing, in a way that it gives an artistic feel to the place where he works and yet retains the originality of the place.


8. Photo realistic modeling and rendering of Coffee Machine, A 2 week project, done as one of the first 3d assignments last year.

9. Apples, shaded using procedural shaders created in Maya. This was a side project I was working on to experiment with procedural shading, using fractals, ramps etc to bring the final output as close as a real apple's look and feel.

10. Splash simulation, a small test done in Realflow to try liquid simulation.
And nothing could have been more eye catching as a slow motion view of a splash of water droplet.


Read more »

CG Shortfilm - 'Psych'


This is my first animated short and is about a guy named Mike, claustrophobic, and his struggle to keep himself together as he's stuck in an elevator, which takes us through his journey of fear and panic. 

It was around 4 months of total production time, and  Maya, 3delight and Photoshop were the main softwares used during the project.

An insight into the making of this short can be found  On this page ←


Read more »

CG + Live Action Integration


This is the video for the latest project I was working on. Its a very short clip, an exercise to learn how to integrate cg elements into a live action footage.
I chose to make something like raining octopuses, and then one of them fall just in front of us.
The most fun part of this exercise was to create the octopus and its Rig.
The animation of the tentacles of the octopus was mostly scripted but offcourse you could control it by the rig, alongside a bit of manual animation. So Scripting the movement of the tentacles, and integrating it with the manual rig was quite a bit of fun. I'll soon upload a video of the rig of the octopus as well.

The exercise includes the 3D tracking of the footage, creating CG elements and lighting/rendering them to match the lighting of the footage and then compositing all the elements together to blend in the cg with live action.

I additionally created a 360-degree HDR panorama of the location to be able to recreate lighting and reflections more easily.

Read more »

Making of: 'Psych'


This post is all about how I made this shortfilm come true. Well a lot of people might find this post a bit boring as its so long! but the one's who are interested in how the film was made, this post is for you. I havent posted all the images and videos, but have tried to talk about most of them. I have spent countless nights in the lab on bean bags just to be able to squeeze out more time out of 24 hours, doing the stuff that I am going to talk about in this post, so I guess it deserves to be shared :) .

 I have divided this post into different parts or jobs that I had to do in this process. This entire project was finished in a duration of around 4 months, including different parts of production starting from the 3d animatic to the final compositing. I hope you enjoy the post!

Starting with the image you see in the top, They are a few selected stills from the shortfilm. In case you haven't seen the shortfilm yet, just go back to the home page and go on the 'Psych' post.

I'll start with the modeling. Below is the turntable of the main character of the film. Mike was an interesting character to make, and I guess of all the things in the film I had worked on the character the most (after all its him the film is all about!)
As you can see, the style I chose was more kind of realistic, as I felt that it will be more effective to bring the tension and panic in the film with a realistic character.

The character was shaded using 6 different maps, each for diffuse, subdermal, epidermal, specular, glossiness, displacement and bump. The diffuse map was created by projecting 4 different images onto the character in maya and cleanup in mudbox.
There was a little amount of sculpting that I did on the shirt and the pants in ZBrush, but only to a limit that they don't interfere with the skinning of the character.


The next image is one of the early lighting and shading tests of the character so as to check how the character will look in the final lighting. There were a few changes that were done on the shaders for the final rendering.


Below are the the three sets of the film with their wireframes. I tried to keep the sets simple to be able to finish them in the set deadline, as if they are complex from the beginning, there will be equally more amount of work in the texturing and rendering parts!


The articulation of the face was a really important factor so as to be able to imitate the real life expressions.
Since there was not a lot of time that I could dedicate to rigging, the facial rig was more optimized for fear/sad/worried kind of expressions, as was demanded by the story of the film.
So there are a lot of controls missing which are essential to achieve a variety of other expressions.


This is short demo of my first character Rig, 'Mike' .

This was my first full character rig so there was a lot to take care about. I had made a planning of the kind of movements the character will have to do in the shortfilm according to the story, and then listed out the kind of setups and rig I will have to make in order to be able to animate it properly.
There are not a lot of fancy rigging tricks that go into this rig, I have tried to keep it as close as possible to the needs of the film and to the deadline by which I had to finish the rig to move onto the next part of the production.

I had IK/FK for both arms and legs, as well as additionally I had both IK/FK setups for the fingers as well, as there was a shot in my short film, where the character tries to imitate a walk cycle using his fingers, so this was included in the planning to an IK setup for that, to make the animation easier.
Another highlight was the setup created for the tie of the character. It was created by using a dynamic curve (Maya hair system) to drive a chain of bones, so that the tie of the character could be simulated realistically. I chose this option over cloth simulation, because it would save a lot of simulation time and gave almost the same output.

I also had to create a setup for roll bone for realistic wrist rotations, which were controlled by a set of expressions written in MEL, and for added control I also added a controller to tweak the rotation of the roll bone.


And I guess thats it! I am sure most of the people  might have got bored by this time but as I said I really wanted to share this, the process of making a film is equally as important as the final output!
Thanks for reading and watching :)

Read more »

3D Still Compositions


The theme for the project was "Artisans". I chose a Cane furniture workshop.Worked on the pre-production of the project in the begining which included preparing moodboard, lighting and ambience boards, and element boards for the project. Went to a real workshop and took pictures of the tools and architecture for the references.Created rough compositions on paper and then in 3d. The next part was to model and solve all the uvs for the models. I created turn-arounds of some of the main objects from our scenes. And in the end worked on the lighting, texturing, rendering and the compositing part. Worked on Autodesk Maya 2012 and Adobe Photoshop CS 5.5 during the whole process.
Below is the turntable video of some of the main objects from both the compositions.


Read more »

Character Modeling - Betty


This was done as a part of my internship at Green Forest Animation Studios, Shenzhen, China. I had to model the low poly base mesh in Maya, and then sculpt the hi-res details in zbrush. Later on I did quick shading and texturing of the model and added quick hair, though they will be changed later.I did not design the character, it was designed at the studio by other artists and a friend of mine who was also interning at the same studio, Varun Nair (www.varunsartwork.blogspot.com) . And the scarf that she is wearing was removed from the design later on.

This was the first time that I used Zbrush! So It was an interesting experience, self-learning all these powerful tools and options zbrush has to offer.
The total duration starting from modeling to rendering was 2 weeks.

Softwares used : Autodesk Maya, Pixologic Zbrush, Adobe Photoshop


Read more »

3D Still: Coffee Machine


This was a 2 week project starting from modelling to rendering the final image.It was the first 3d project of the year to prepare us for the next bigger project.The most interesting part of the project was create the shader for the metal.

Read more »

2D + Live Action Integration


This was a group project and the aim of the project was to integrate a 2D character into live action footage.
Took around a week's time spread over 3 weeks including shooting live action footage, character design, animation, tracking, compositing and editing.
It is kind of a commercial for headphones called "Alien Beats" by an imaginary company AB.

Audio Track : Reptile by Skrillex [No Rights Reserved]
Softwares Used : Adobe Aftereffects, Photoshop and Audition


Credits:


Concept, Direction and Editing : Kartik Gupta and Kenrick D'Cunha
Character and Logo Design : Kenrick D'Cunha
Camera handling, Tracking, Animation, Compositing and Color Grading : Kartik Gupta


Read more »

Procedural Shading: Apples


I did this quick project to try rendering food. It took me a week to model and create the procedural shader for the apples. In the whole process, no existing textures were used for the texturing.


Read more »

Character Modeling - Android


This was a 2 and a half week-project which included designing the character and eventually modeling it in Autodesk Maya. Below are stills of the model with their wireframes .


Read more »

Diamond Render Test


This was a very early test to try to render a diamond. The diamond was modeled by studying the cuts of a real diamond. The reason to try this was to capture some very brilliant properties of diamond such as chromatic aberration. No plugins were used in the entire process. Maya's default depth of field and Bokeh lens shader were used to achieve chromatic aberration. Due to increased render time, I could not render a High Definition image.

Read more »

Splash Simulation


This was a very early attempt to simulate a splash. The Simulation was done in Nextlimit Realflow, Rendering in Autodesk Maya and finally composited in Nuke.

Read more »

Car Modeling - Hummer


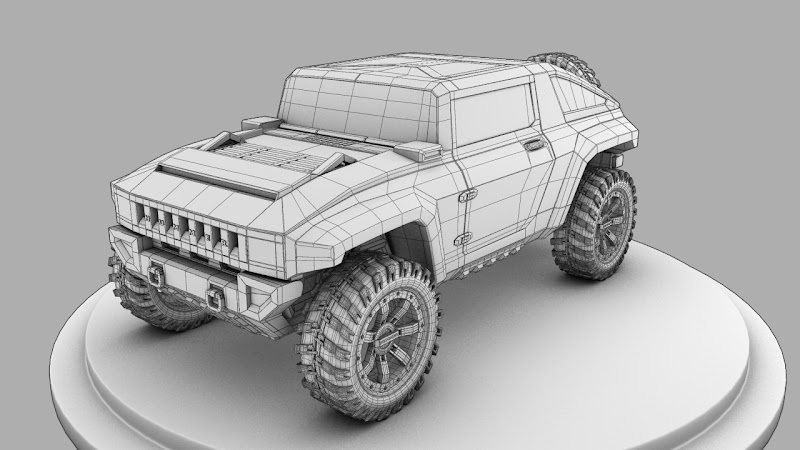
This was a very old project that I did to try mechanical kind of modeling, I modeled The Hummer HX. Have tried to keep it as close as possible to the actual design of the Car.I have posted the turnaround of the model and a test-render of the model with some basic textures.Used Autodesk Maya for the Modeling and Rendering, and Adobe Photoshop to composite the image.


Read more »
Powered by Blogger.